
硬件准备:
制作一个 openSUSE Leap 15.1 安装 U 盘, openSUSE Leap 15.1 系统景象下载地址:
软件准备:
在第三方 openSUSE Leap 15.1 软件源上下载无线网卡驱动 broadcom-wl 和无线网卡驱动的依赖软件 broadcom-wl-kmp:
https://mirrors.aliyun.com/packman/openSUSE_Leap_15.1/Essentials/x86_64/
正文:
步骤一:在 MacBook Air(2017)上安装 openSUSE Leap 15.1 的前期工作
1.1 将 openSUSE 的安装 U 盘插在 MacBook Air(2017)上
(步骤略)
(注意:U 盘需要是 ufi 模式)
1.2 在 MacBook Air(2017)上插入一根无驱动版 Linux 可识别的网线转 usb 网卡,并连接互联网
(步骤略)
1.3 按 MacBook Air(2017)的开机键后立刻按住 option 键
(步骤略)
1.4 选择从 U 盘进入系统
(步骤略)
步骤二:在 MacBook Air(2017)上安装 openSUSE Leap 15.1版本的 Linux 操作系统
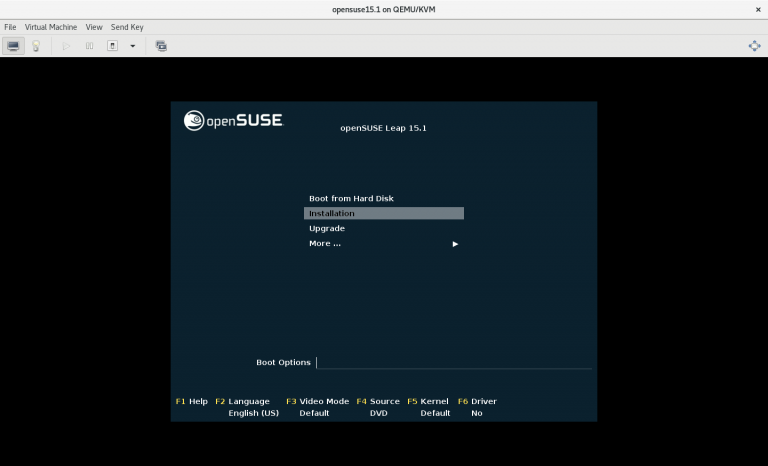
2.1 进入 U 盘界面后选择 “Installation” 并回车
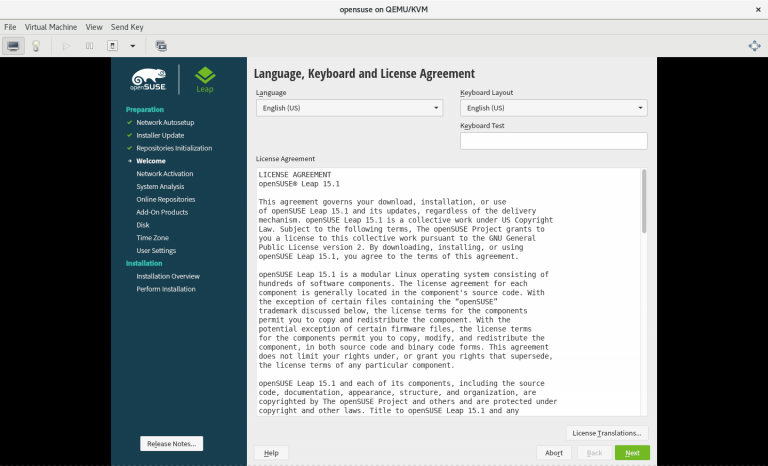
2.2 直接点击 “Next”
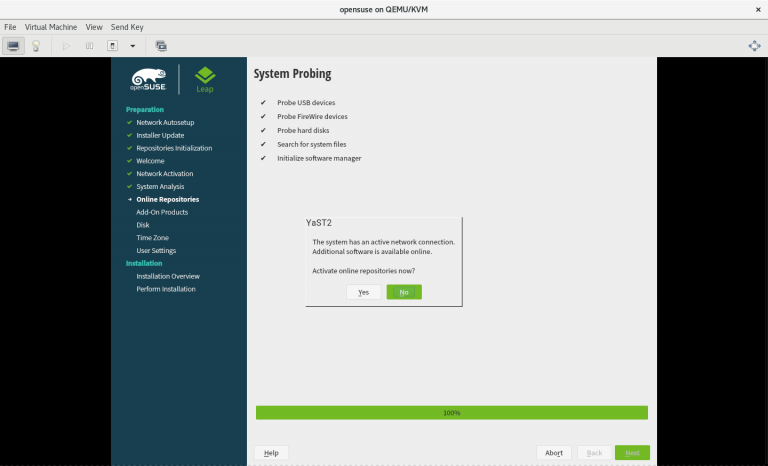
2.3 当出现 “Activate online repositories now?” 时直接点击 “No”
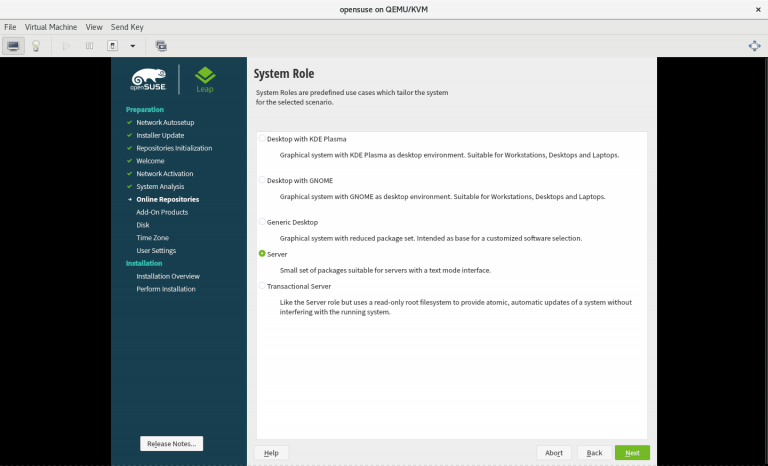
2.4 选择 “Server” 并点击 “Next”
2.5 点击 “Guided Setup”

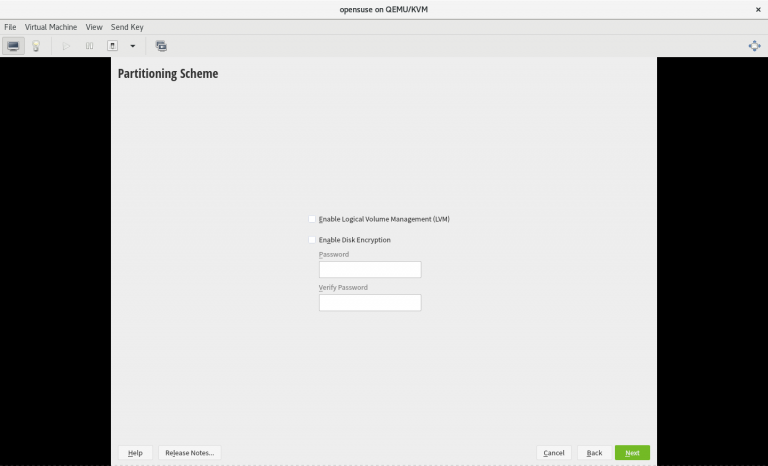
2.6 不设置硬盘密码,直接点击 “Next”
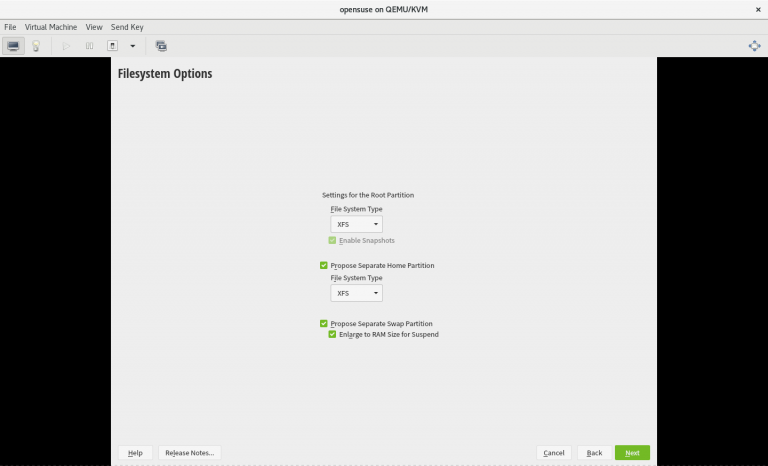
2.7 按图:7 对硬盘进行设置
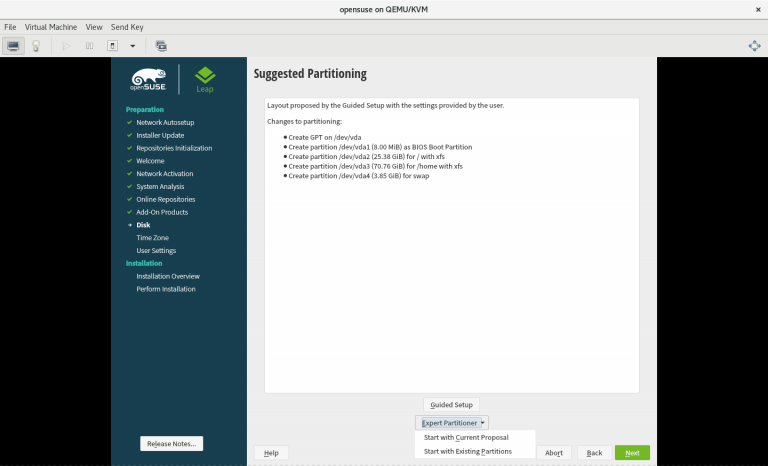
2.8 点击 “Expert Partitioner” 下的 “Start with Current Proposal”
2.9 按图:9 对硬盘进行分区并点击 “Accept”
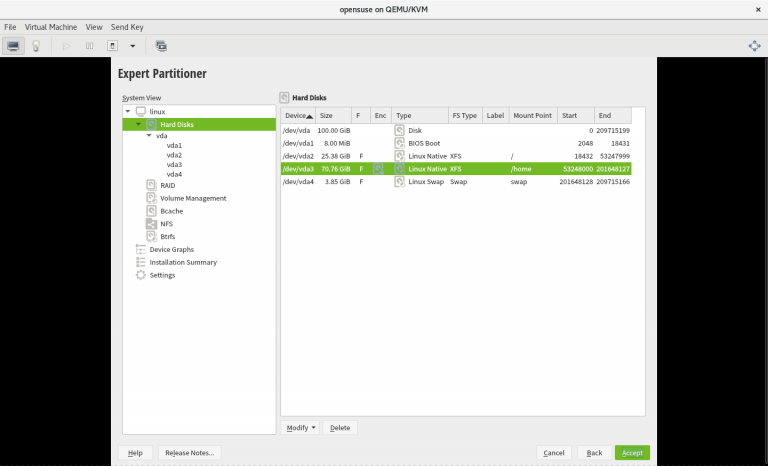
(
补充:
1) 要分出一部分硬盘空间用作系统启动
2) 系统分区不设置硬盘加密否则系统开机时会需要输入两次硬盘加密密码
3) 数据分区可以设置硬盘加密
4) 交换分区和内存设置的大小相同
5) 在左侧选择 “Hard Disks”,再在右侧选择对应的分区,再点击 “Delete” 可以将对应的分区删除
6) 在左侧选择 “Hard Disks”,再在右侧选择对应的硬盘,再点击 “Partitions” 可以创建、删除和修改分区
)
2.10 点击 “Next”

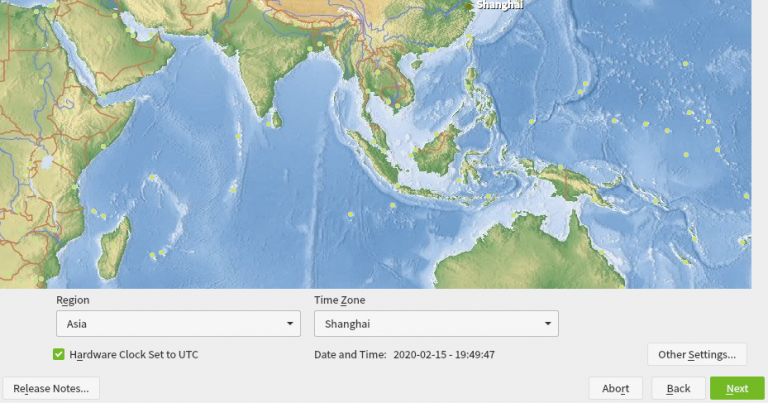
2.11 点击对应的地区选择对应的日期并点击 “Next”
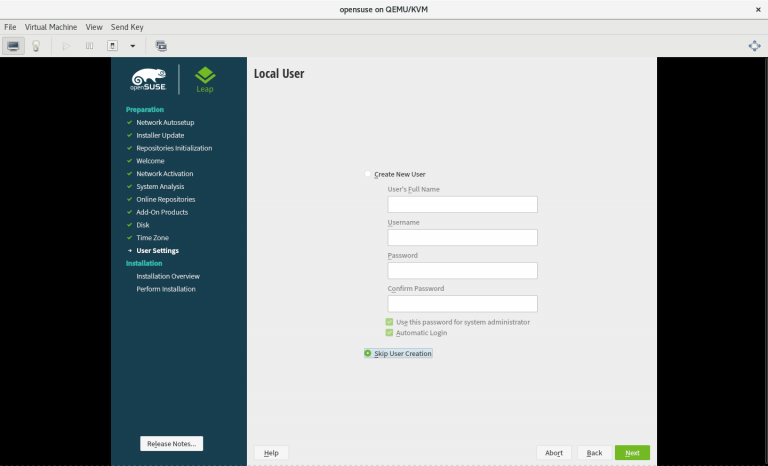
2.12 选择 “Skip User Creation” 并点击 “Next”
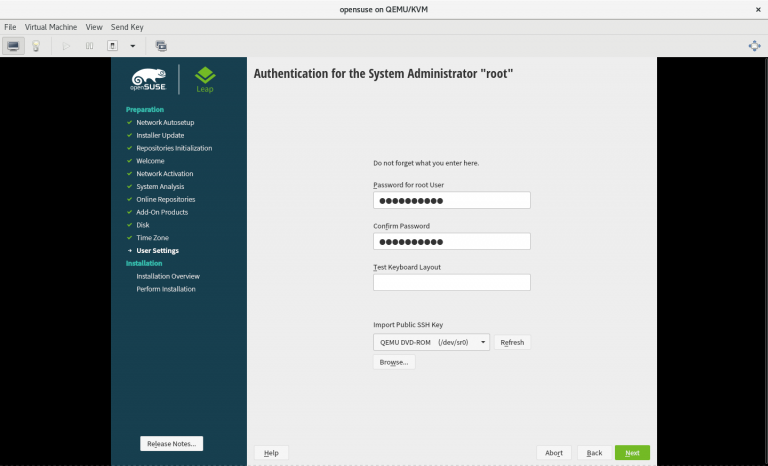
2.13 给 root 用户设置密码并点击 “Next”
2.14 按图:14 对即将安装的系统进行设置并点击 “Install”
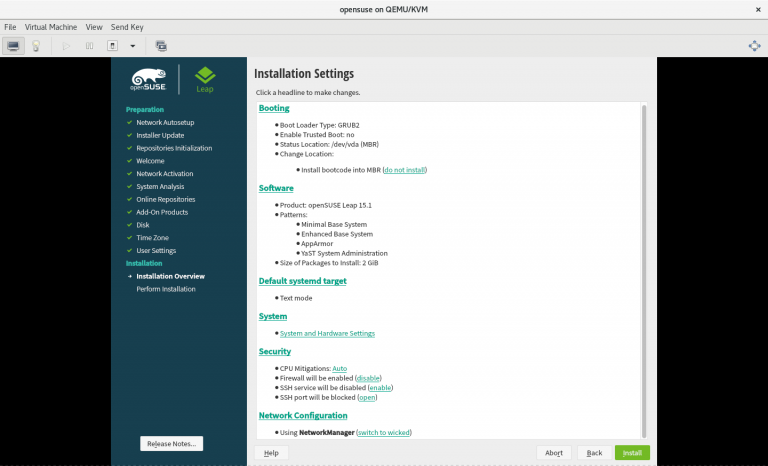
(
补充:
1) 在 “Security” 下开启 “Firewall”
2) 在 “Security” 下关闭 “SSH service”
3) 在 “Security” 下锁住 “SSH port”
4) 在 “Network Configuration” 下使用 “NetworkManager”
)
2.15 此时系统便开始安装,等待系统安装完成
(步骤略)
步骤三:对 openSUSE Leap 15.1 操作系统进行配置
3.1 系统安装完成后使用 root 用户登录系统
3.2 修改电脑名称
# hostnamectl set-hostname linux3.3 安装无线网卡驱动
3.3.1 安装无线网卡驱动依赖包
# zypper in broadcom-wl-kmp-default-6.30.223.271_k4.12.14_lp151.28.36-pm151.11.61.x86_64.rpm3.3.2 安装无线网卡驱动
# zypper in broadcom-wl-6.30.223.271-pm151.11.61.x86_64.rpm3.4 使用 openSUSE Leap 15.1 官方的软件源
3.4.1 进入 yast
# yast
3.4.2 选择 “Software” 下的 “Software Repositoies” 并回车
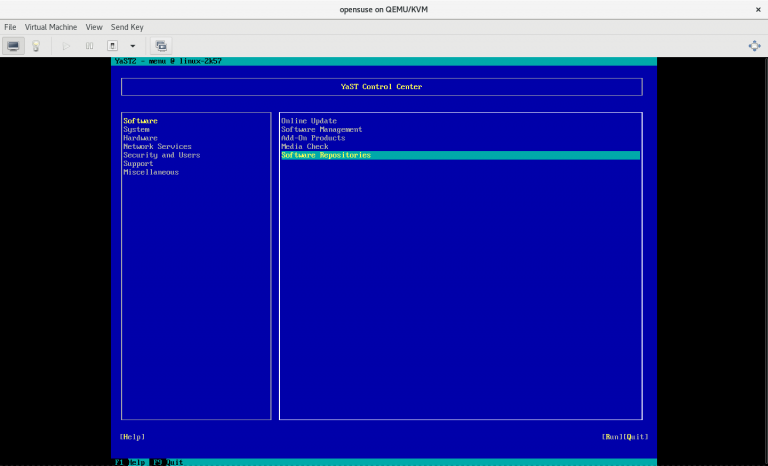
3.4.3 按图:17 设置系统软件源,之后选择 OK 并回车

(
补充:
1) Enabled “Main Repository”
2) Enabled “Main Update Repository”
3) Enabled “Non-OSS Repository”
4) Enabled “Update Repository(Non-Oss)”
5) 确保其他的软件源没有被 Enabled
)
3.4.4 选择 “Quit” 并回车
3.5 给系统安装最新的补丁
# zypper -n update3.6 安装中文包
3.6.1 进入 yast
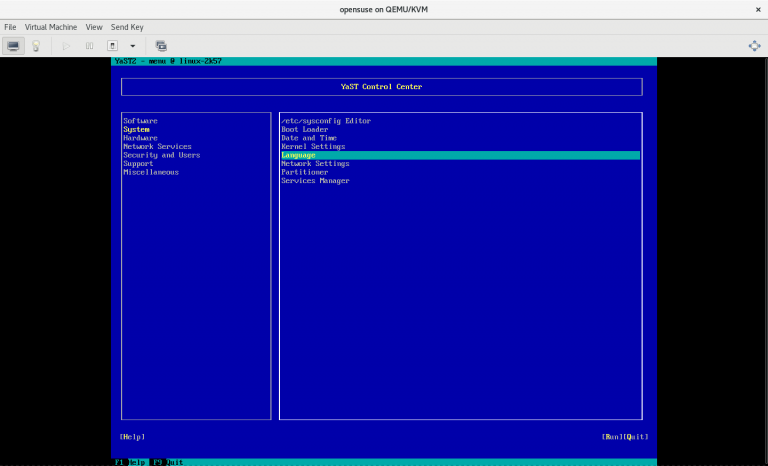
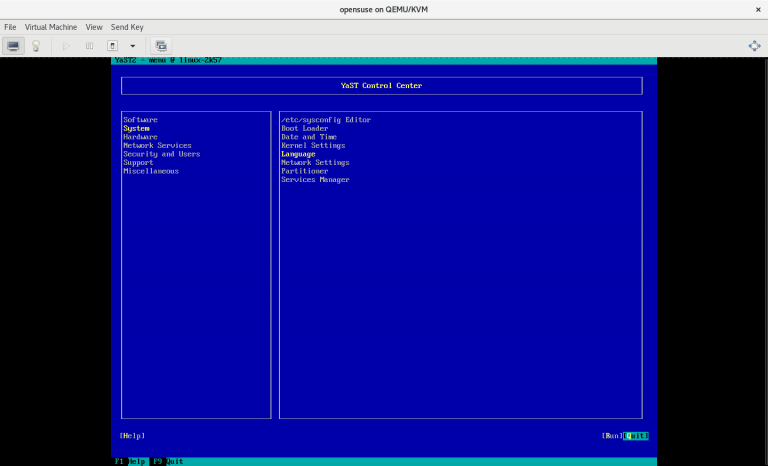
# yast3.6.2 选择 “System” 下的 “Language” 并回车
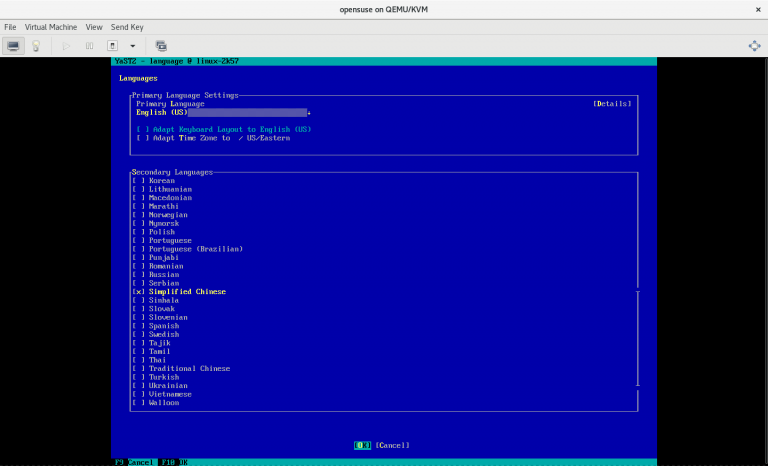
3.6.3 在 “Secondary Languages” 下选择 “Simplified Chinese” ,再选择 “OK” 并回车
3.6.4 选择 “Quit” 并回车
3.7 让电脑支持 exfat 格式的 U 盘
# zypper -n install fuse-exfat exfat-utils3.8 安装虚拟机环境和管理软件
# zypper in -t pattern kvm_server
# zypper in -t pattern kvm_tools
3.9 安装图形化桌面
3.9.1 安装 Gnome 图形桌面
# zypper -n in -t pattern gnome3.9.2 将系统默认的图形桌面设置为 Gnome 图形桌面
# zypper -n in -t pattern gnome......
DISPLAYMANAGER_XSERVER="Xorg"修改为:
......
DISPLAYMANAGER_XSERVER="gdm"
3.9.3 设置系统开机进入图形桌面
# systemctl set-default graphical.target3.9.4 立刻进入图形桌面
# init 53.9.5 输入 root 用户
3.9.6 输入 root 用户的密码
3.9.7 此时便进入图形桌面
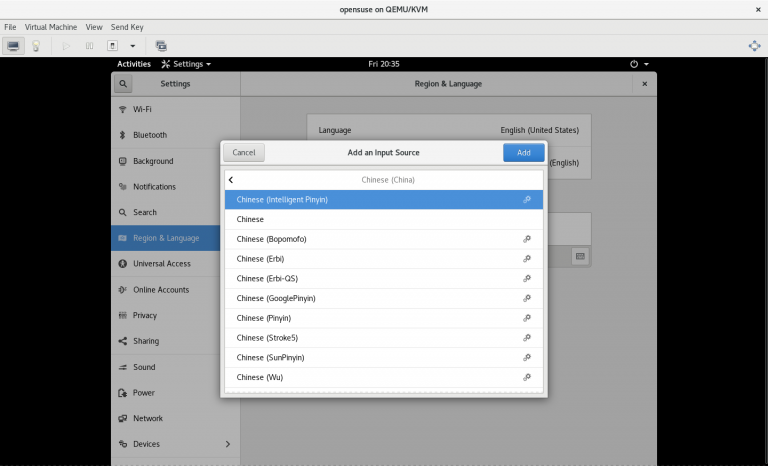
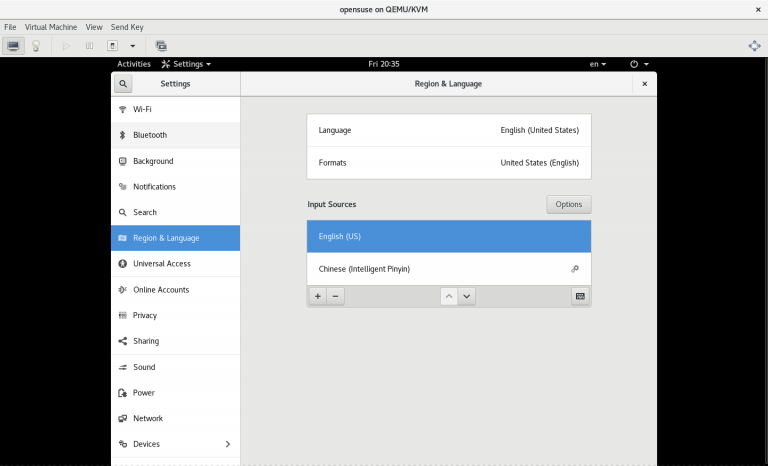
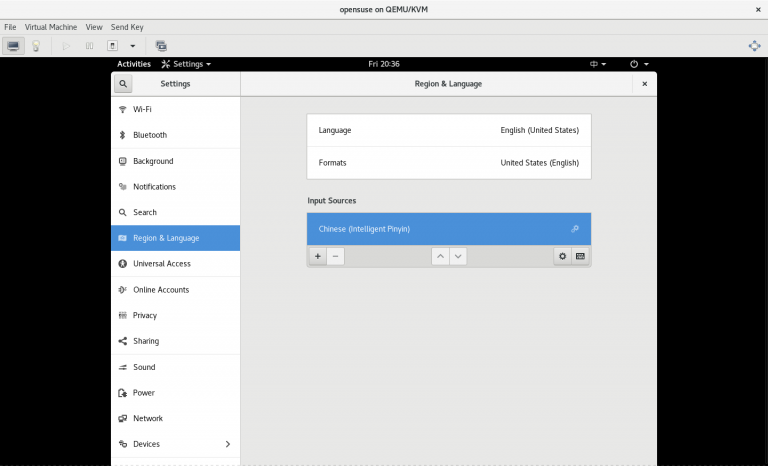
3.10 设置中文输入法
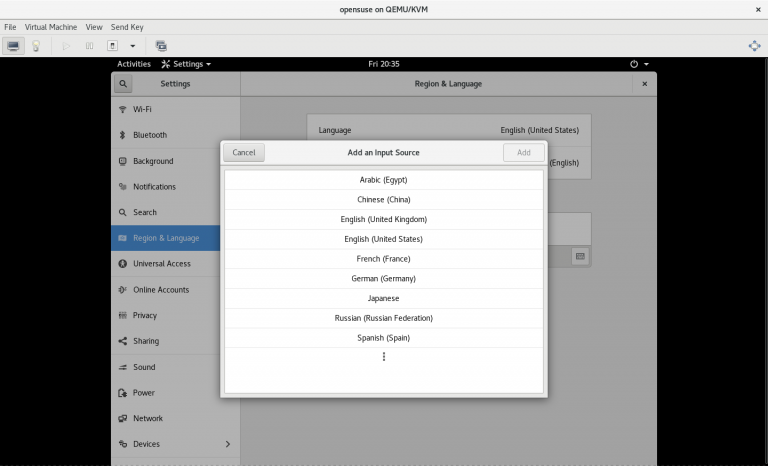
3.10.1 点击左上角的 “Activites” 再点击 “Settings”
3.10.2 点击 “Region & Language”
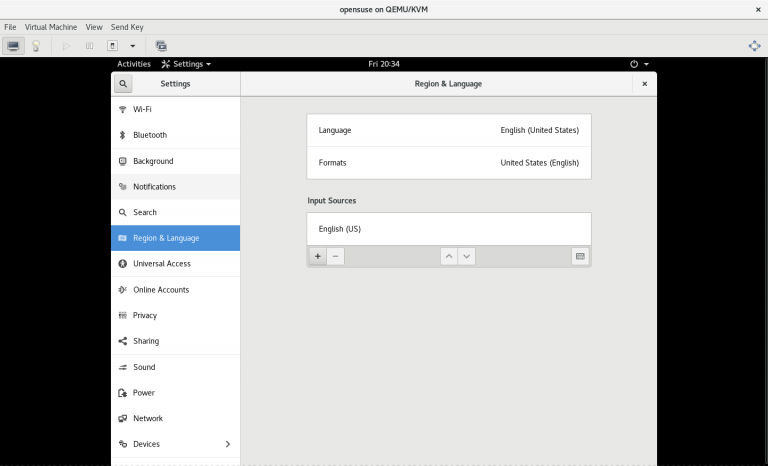
3.10.3 点击 “Input Sources” 下面的 “+” 将 “English(US)” 换成 “Chinese (Intelligent Pinyin)”
3.10.4 点击右上角的 “×” 以退出此界面
(步骤略)
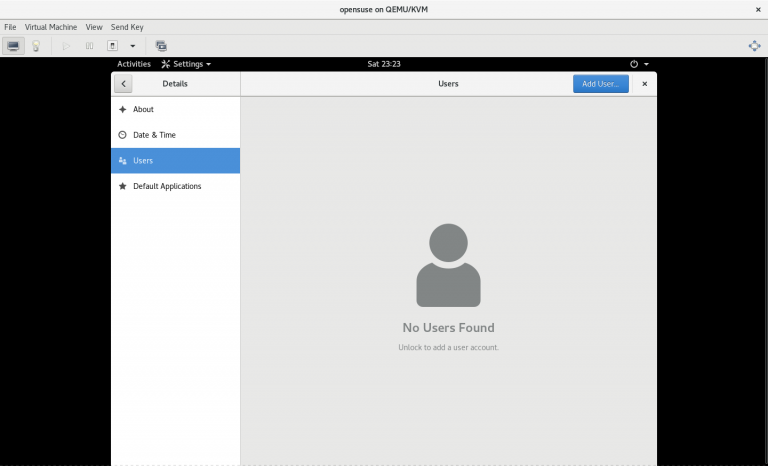
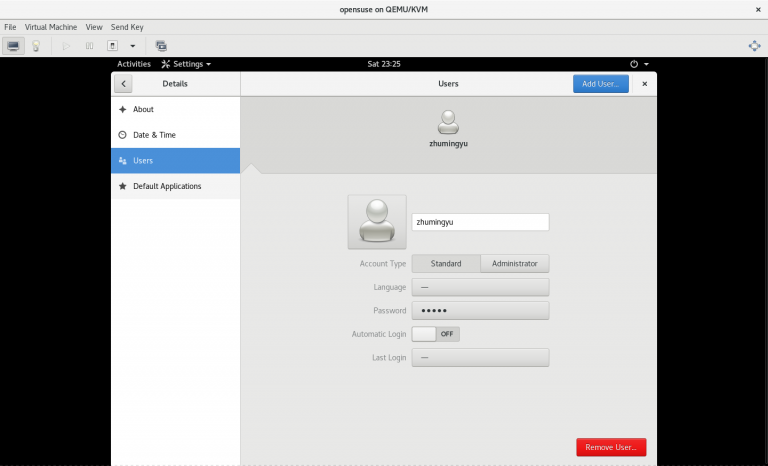
3.11 添加新用户
3.11.1 点击右上角 “root” 下的 “Account Settings”
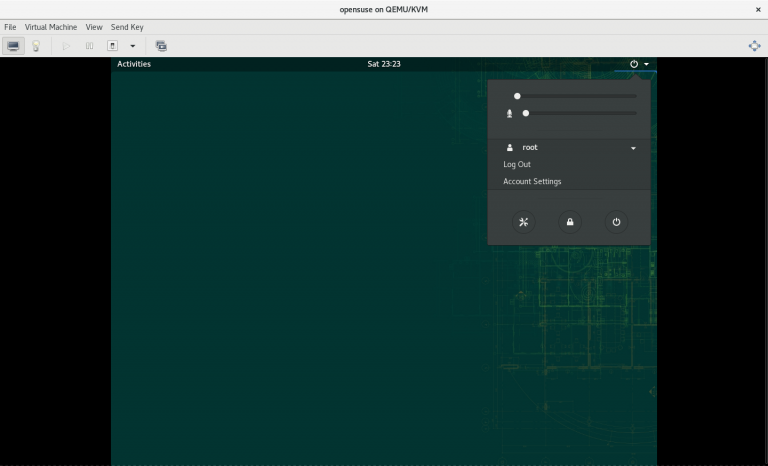
3.11.2 点击右上角的 “Add User…”
3.11.3 按图:32 设置用户和用户密码并点击 “Add”
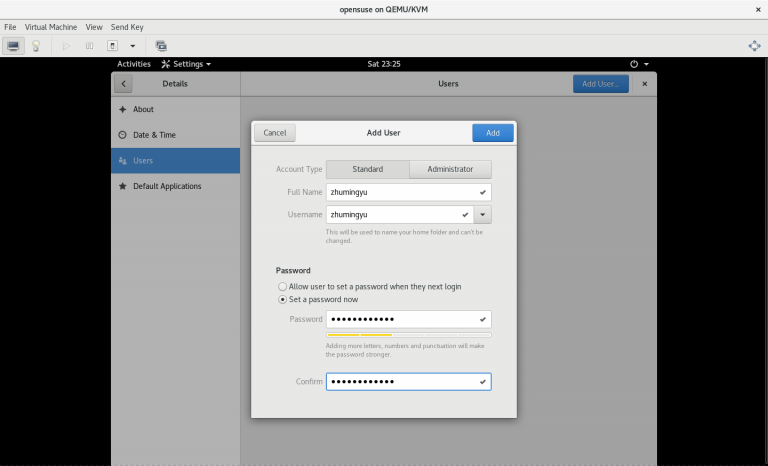
(
补充:
1) 设置 “Full Name”
2) 设置 “Username”
3) 选择 “Set a password now”
4) 设置 “Password”
)
3.11.4 关闭此界面
3.12 此时 openSUSE 操作系统配置完成
补充一:使用 VPN 的方法
# sslocal -s <server IP address> -p <server port> -l <local port> -k <server VPN password> -t 600 -m <server VPN encryption method>(
补充:
1) 服务器的 IP 地址、服务器的端口号、服务器的 VPN 密码和服务器的 VPN 加密方法由服务端设置
2) 本地端口号可自行设置
)
(注意:这里的“本地端口号”要与刚刚在 /etc/proxychains.conf 里设置的 “socks5 127.0.0.1 1000” 中的 “1000” 一致)
# proxychains4 <application which need use VPN>补充二:使用虚拟机环境和管理器的方法
2.1 启用虚拟机环境
# systemctl start libvirtd2.2 启动虚拟机管理器
# virt-manager