
注意:
在创建 KVM 虚拟机之前要先安装 KVM 并创建 KVM 虚拟网络
软件准备:
在 openSUSE 官网上下载安装系统所需要的镜像:
https://software.opensuse.org/distributions/leap
正文:
步骤一:理解创建 KVM 虚拟机模板的目的
主要用于批量克隆出新的 KVM 机器,节约创建新虚拟机的时间
步骤二:为这个虚拟机创建硬盘文件
1.1 创建硬盘文件
(只在真机上执行以下步骤)
# qemu-img create -f qcow2 /var/lib/libvirt/images/template_opensuse_leap_15_10g.qcow2 10G(补充:这里以创建 10G 大小的 template_opensuse_leap_15_10g.qcow2 硬盘文件为例)
1.2 确认硬盘文件已创建
(只在真机上执行以下步骤)
# ls /var/lib/libvirt/images/ | grep template_opensuse_leap_15_10g.qcow2(补充:这里以确认 template_opensuse_leap_15_10g.qcow2 硬盘文件为例)
步骤三:使用 KVM 和刚刚创建的硬盘文件新安装一台虚拟机
3.1 启动 KVM 的 virt-manager
(只在真机上执行以下步骤)
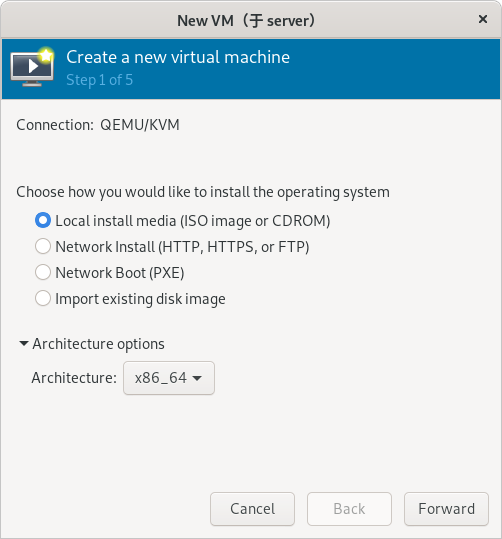
# virt-manager3.2 在 virt-manager 上的左上角点击文件之后 “点击新建虚拟机”
(只在真机上执行以下步骤)
(步骤略)
3.2.1 选择以本地安装介质的方式安装系统
(只在真机上执行以下步骤)
3.2.2 选择安装系统的系统镜像
(只在真机上执行以下步骤)
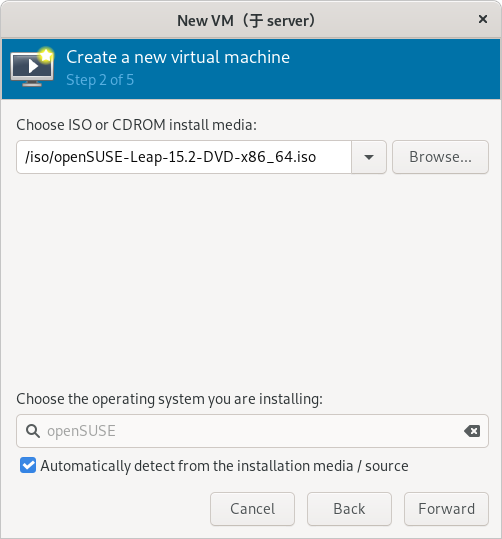
(补充:这里以使用 openSUSE-Leap-15.2-DVD-x86_64.iso 系统镜像为例)
3.2.3 设置内存大小和 CPU 核心数
(只在真机上执行以下步骤)
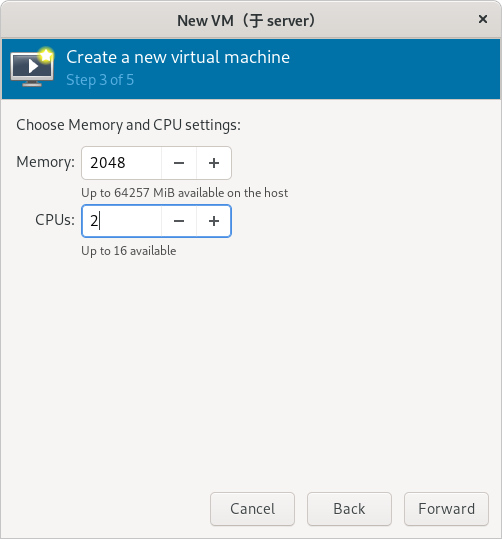
(补充:这里以设置 2048 MiB 内容和 2 核 CPU 为例)
3.2.4 选择用刚刚创建的硬盘文件来安装系统
(只在真机上执行以下步骤)

(补充:这里以使用 template_opensuse_leap_15_10g.qcow2 硬盘文件为例)
3.2.5 给虚拟机命名并选择虚拟网络
(只在真机上执行以下步骤)
(注意:虚拟网络必须提前创建好)

(补充:这里以将虚拟机命名为 template_opensuse_leap_15_10g 并使用 0 网络为例)
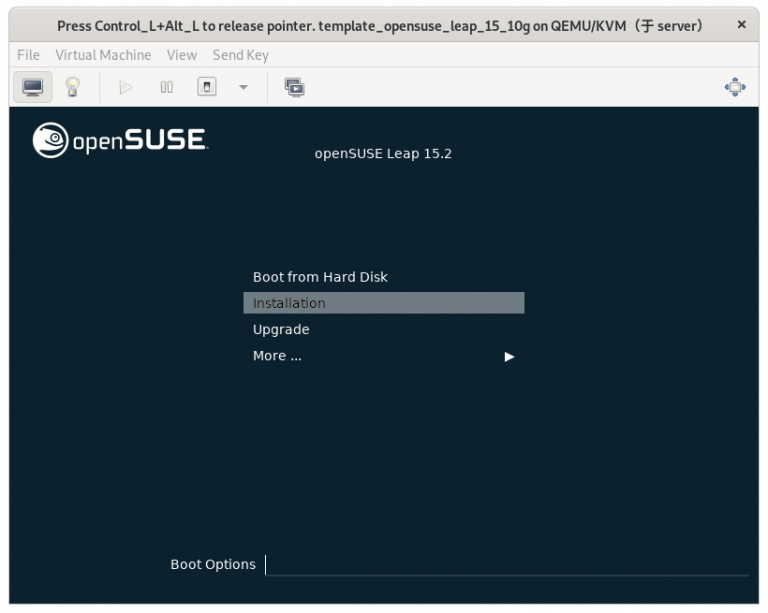
3.2.6 开始安装系统
(只在真机上执行以下步骤)
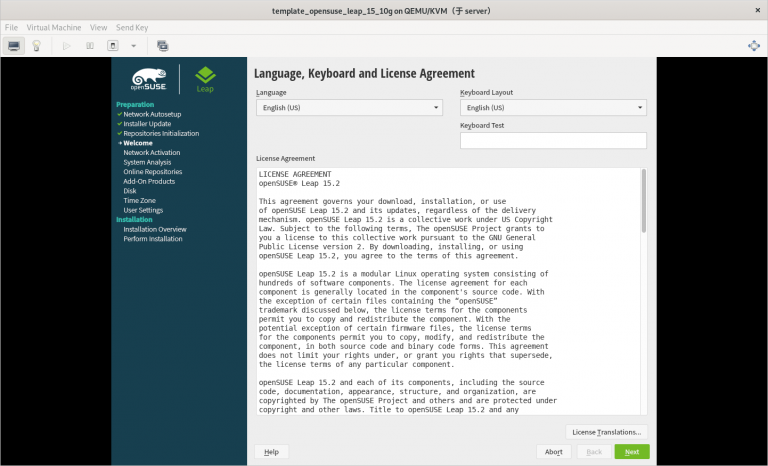
3.2.7 进入 “Language, Keyboard and License Agreement” 后选择系统语言,再点击 “Next”
(只在真机上执行以下步骤)
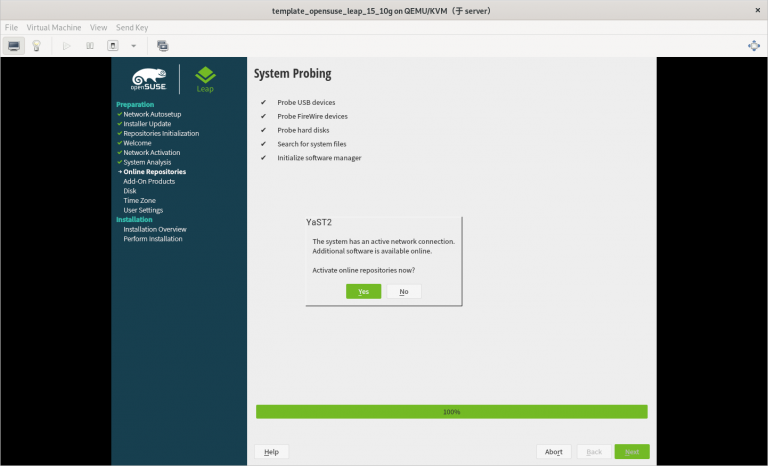
3.2.8 当出现 “Activate online repositories now?” 时,点击 “No”
(只在真机上执行以下步骤)
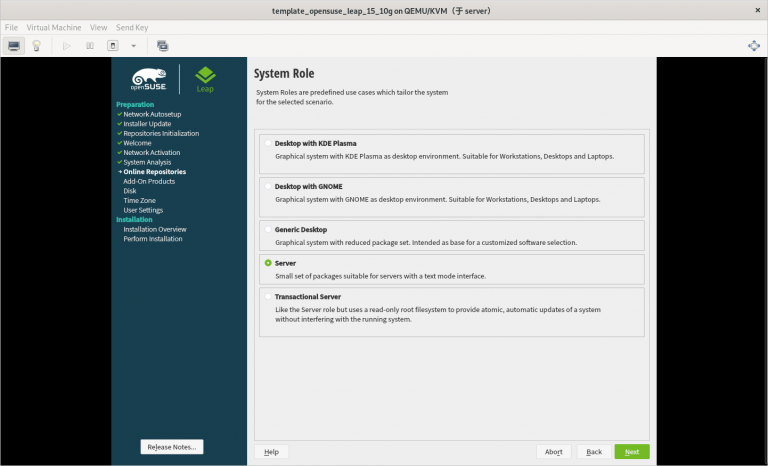
3.2.9 进入 “System Role” 后选择 “Server”,再点击 “Next”
(只在真机上执行以下步骤)
3.2.10 进入 “Suggested Partitioning” 后点击 “Guided Setup”
(只在真机上执行以下步骤)

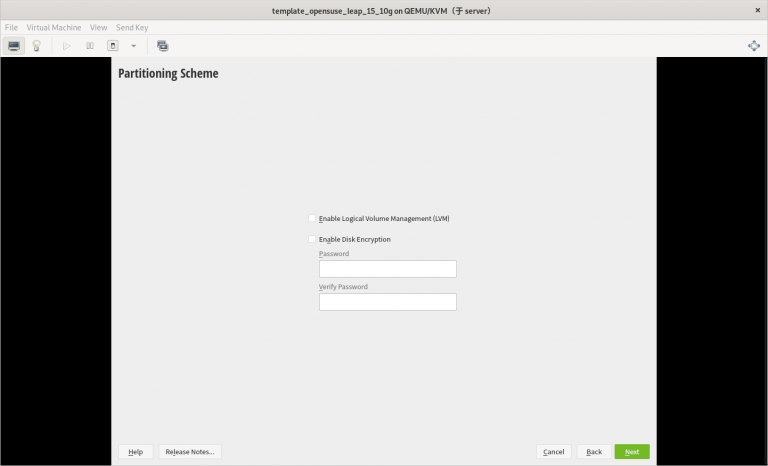
3.2.11 进入 “Partitioning Scheme” 后点击 “Next”
(只在真机上执行以下步骤)
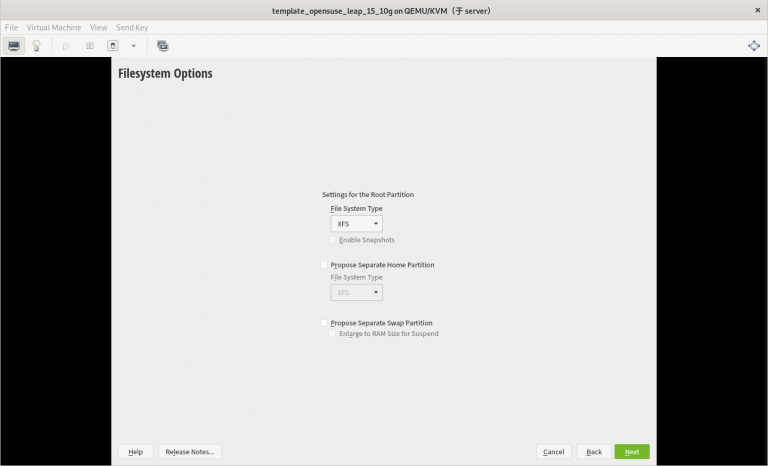
3.2.12 进入 “Filesystem Options” 后 “File System Type“ 选择 “XFS”,再点击 “Next”
(只在真机上执行以下步骤)
3.2.13 回到 “Suggested Partitioning” 后点击 “Next”
(只在真机上执行以下步骤)

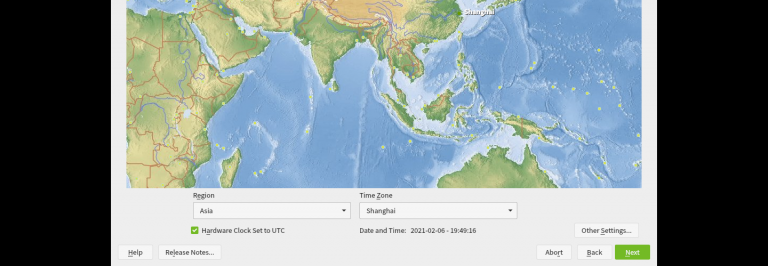
3.2.14 进入 “Clock and Time Zone” 后选择时区,再点击 “Next”
(只在真机上执行以下步骤)
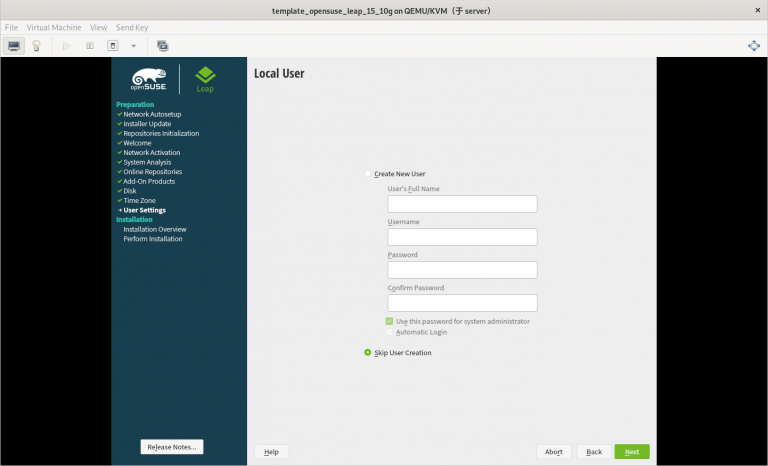
3.2.15 进入 “Local User” 后选择 “Skip User Creation” 并点击 “Next”
(只在真机上执行以下步骤)
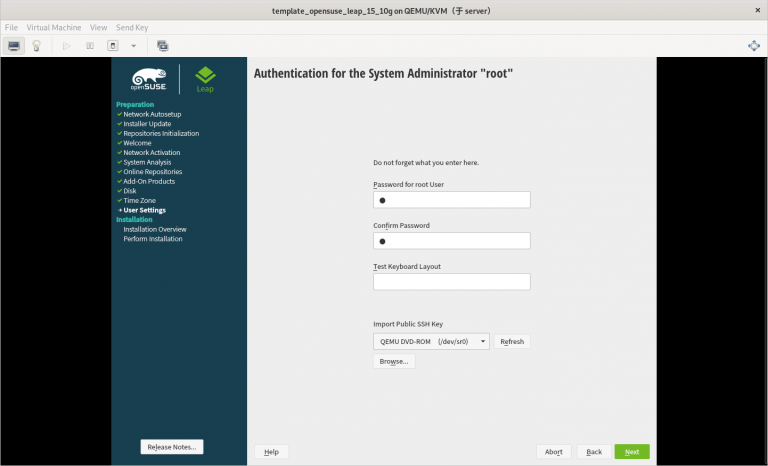
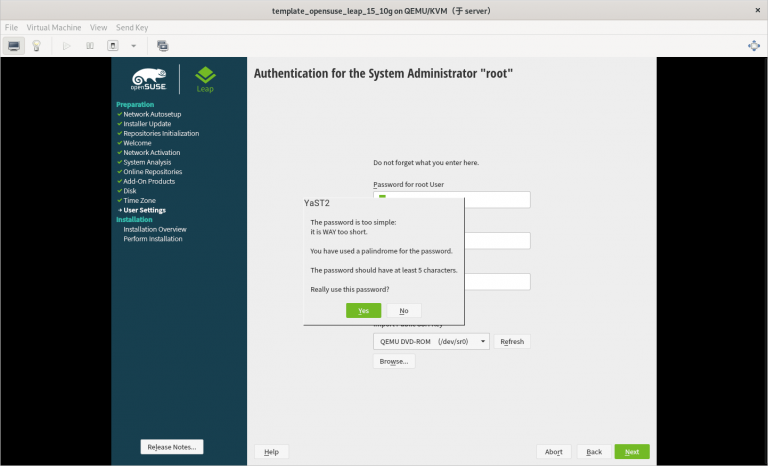
3.2.16 进入 “Authentication for the System Administrator “root”” 后给 root 设置密码,再点击 “Next”
(只在真机上执行以下步骤)
3.2.17 如果出现 “YaST2 The password is too simple” 则点击 “Yes”
(只在真机上执行以下步骤)
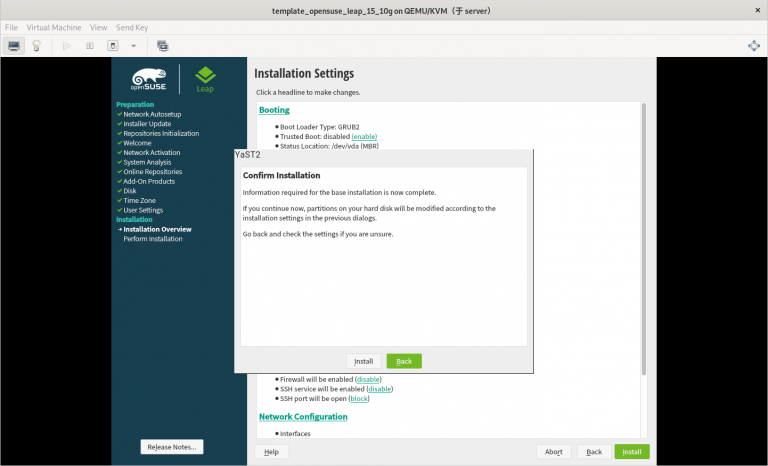
3.2.18 进入 “Installation Settings” 后点击 “Next”
(只在真机上执行以下步骤)

3.2.19 当出现 “Confirm Installation” 时点击 “Install”
(只在真机上执行以下步骤)
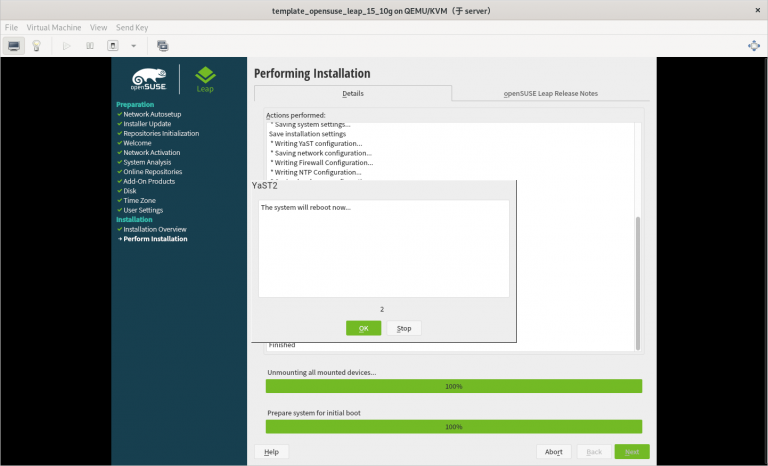
3.2.20 当出现 “The system will reboot now…” 时,点击 “Ok”
(只在真机上执行以下步骤)
3.2.21 在安装系统的过程中需要注意的内容总结
(只在真机上执行以下步骤)
1) 一定要使用刚刚创建的 template_opensuse_leap_15_10g.qcow2 作为安装虚拟机的硬件文件
2) 虚拟机网络 “0” 要提前创建好
3) 只分一个分区,只设置一个挂载点挂载到根,使用标准硬盘,硬盘格式是 XFS
4) 选择最小化安装系统
步骤四:进入新创建虚拟机修改配置
4.1 添加 Console 配置
4.1.1 修改 grub 内核配置文件
(只在虚拟机上执行以下步骤)
# vi /etc/default/grub将全部内容修改如下:
# If you change this file, run 'grub2-mkconfig -o /boot/grub2/grub.cfg' afterwards to update
# /boot/grub2/grub.cfg.

# Uncomment to set your own custom distributor. If you leave it unset or empty, the default
# policy is to determine the value from /etc/os-release
GRUB_DISTRIBUTOR=
GRUB_DEFAULT=saved
GRUB_HIDDEN_TIMEOUT=0
GRUB_HIDDEN_TIMEOUT_QUIET=true
GRUB_TIMEOUT=8
GRUB_CMDLINE_LINUX_DEFAULT="splash=silent mitigations=auto quiet"
GRUB_SERIAL_COMMAND="serial --unit=1 --speed=115200"
GRUB_CMDLINE_LINUX="biosdevname=0 net.ifnames=0 console=tty0 console=ttyS0,115200n8"
GRUB_DISABLE_LINUX_UUID="true"
GRUB_ENABLE_LINUX_LABEL="true"
GRUB_DISABLE_RECOVERY="true"

# Uncomment to automatically save last booted menu entry in GRUB2 environment

# variable `saved_entry'
# GRUB_SAVEDEFAULT="true"
#Uncomment to enable BadRAM filtering, modify to suit your needs

# This works with Linux (no patch required) and with any kernel that obtains
# the memory map information from GRUB (GNU Mach, kernel of FreeBSD ...)
# GRUB_BADRAM="0x01234567,0xfefefefe,0x89abcdef,0xefefefef"
#Uncomment to disable graphical terminal (grub-pc only)

GRUB_TERMINAL="gfxterm"
# The resolution used on graphical terminal
#note that you can use only modes which your graphic card supports via VBE

# you can see them in real GRUB with the command `vbeinfo'
GRUB_GFXMODE="auto"
# Uncomment if you don't want GRUB to pass "root=UUID=xxx" parameter to Linux
# GRUB_DISABLE_LINUX_UUID=true
#Uncomment to disable generation of recovery mode menu entries

# GRUB_DISABLE_RECOVERY="true"
#Uncomment to get a beep at grub start

# GRUB_INIT_TUNE="480 440 1"
GRUB_BACKGROUND=
GRUB_THEME=/boot/grub2/themes/openSUSE/theme.txt
SUSE_BTRFS_SNAPSHOT_BOOTING="true"
GRUB_DISABLE_OS_PROBER="false"
GRUB_ENABLE_CRYPTODISK="n"
GRUB_CMDLINE_XEN_DEFAULT="vga=gfx-1024x768x16"
4.1.2 使修改的 grub 内核配置生效
(只在虚拟机上执行以下步骤)
# grub2-mkconfig -o grub4.2 将系统自动挂载的硬盘从使用 uuid 换成硬件路径
4.2.1 显示根分区的 UUID
(只在虚拟机上执行以下步骤)
# blkid
/dev/vda1: UUID="53ee2f87-89b8-4cd7-a4dc-0957d28f4831" TYPE="xfs" PARTUUID="3d8377ef-01"
(补充:这里的 UUID 是: 53ee2f87-89b8-4cd7-a4dc-0957d28f4831)
4.2.2 在自动挂载文件里将根分区的 UUID 换成硬件路径
(只在虚拟机上执行以下步骤)
# vi /etc/fstab将以下内容:
......
UUID=53ee2f87-89b8-4cd7-a4dc-0957d28f4831 /                   xfs     defaults        0 0
(补充:这里的 UUID 是: 53ee2f87-89b8-4cd7-a4dc-0957d28f4831)
修改为:
......
/dev/vda1 /                   xfs     defaults        0 0
4.3 删除不用的软件
(只在虚拟机上执行以下步骤)
# zypper -n rm firewalld-*4.4 进行分区扩展
4.4.1 安装分区扩展软件
(只在虚拟机上执行以下步骤)
# zypper -n in growpart4.4.2 设置开机自动扩容根目录
4.4.2.1 创建开机自动扩容根目录的配置文件
# vim /etc/init.d/after.local创建以下内容:
/usr/bin/growpart /dev/sda1
/usr/sbin/xfs_growfs /
4.4.2.2 给开机自启配置文件相应的权限
# chmod 755 /etc/init.d/after.local4.5 只使用本地软件源(选做)
4.5.1 禁用所有软件源(选做)
(只在虚拟机上执行以下步骤)
# zypper mr -da4.5.2 添加本地软件源(选做)
(只在虚拟机上执行以下步骤)
# zypper ar -fcg http://10.0.0.254/openSUSE-Leap-15/ lan(注意: http://10.0.0.254/openSUSE-Leap-15/ 需要根据真实环境的情况进行更改)
4.5.3 添加本地软件源(选做)
(只在虚拟机上执行以下步骤)
# zypper ref4.6 修改虚拟机系统的名称
(只在虚拟机上执行以下步骤)
# hostnamectl set-hostname template_opensuse_leap_15_10g4.7 启用 serial 服务实现通过 virsh console 命令控制虚拟机
(只在虚拟机上执行以下步骤)
# systemctl start serial-getty@ttyS0
# systemctl enable serial-getty@ttyS0
4.8 清除虚拟系统的历史命令
(只在虚拟机上执行以下步骤)
# history -c4.9 关闭虚拟机
(只在虚拟机上执行以下步骤)
# poweroff步骤五:修改新创建的虚拟机配置文件
删除配置文件里 cdrom 相关的部分
# vim /etc/libvirt/qemu/template_opensuse_leap_15_10g.xml删除以下内容:
......
    <disk type='file' device='cdrom'>
      <driver name='qemu' type='raw'/>
      <source file='/test/iso/openSUSE-Leap-15.2-DVD-x86_64.iso'/>
      <target dev='sda' bus='sata'/>
      <readonly/>
      <address type='drive' controller='0' bus='0' target='0' unit='0'/>
    </disk>
......
步骤六:此时就可以将此虚拟机的硬件文件作为模板进行批量克隆虚拟机了
(只在真机上执行以下步骤)
(步骤略)